Jot down yer email, and we’ll be sure to let ye know when there’s something new on the horizon.
“Yo Ho! Yo Ho! A pirate’s life for me!”
After stealing “the greatest pirate treasure of all time: a golden key to other lands,” witty Captain Jack Sparrow has fled to the Sea of Thieves in hopes of evading the wrath of the ever-vengeful Davy Jones.
Although Jack did make it to the Sea of Thieves, he is not quite as free as he’d hoped. Upon discovering Jack and the golden key, the Ferryman locked both aboard the Ferry of the Damned.
You see, me hearties, the Ferryman worries who else might use that key. With the power to open portals to once unreachable worlds, including the mysterious Sea of the Damned, the key could end the pirate way of life. If dark forces acquire it, the Sea of Thieves as we know it would be gone.
We must learn all we can about the key and its whereabouts. To do so, we must first find and free Captain Jack Sparrow!
If you are looking for just journal locations, check out our guide here! Finding all ten journals will earn you two commendations: (1) “Tales of the Damned” and (2) “The Crew of the Headless Monkey.” However, if you need help with the Tall Tale and finding the journals, read on!
The A Pirate's Life Tall Tale: Step by Step
Step 1: Starting the Tall Tale, "A Pirate's Life"
To begin your daring journey to the Sea of the Damned, you must first find the Mysterious Castaway at the “Castaway’s Camp.” Do not worry. You can find this camp at any Outpost!
Conspicuously placed on the beach—relatively near the main dock—you’ll see a large structure made from a ship’s hull. Just outside the structure, beneath a tattered sail, you’ll see a campfire lit with green-teal flames.
Standing in front of those flames, you’ll see the Mysterious Castaway.
You may speak with the Mysterious Castaway, but she will be awfully cryptic at first.
Along the wall of her ship’s hull, you’ll see all five Tall Tale books. You’re looking for the book next to a small galleon.
Approach that book, and you’ll see its title and a brief description. You’ll also see the prompt to “Vote For Tall Tale.” Follow that prompt!
Once you and your crew have voted, the Mysterious Castaway will begin telling the tale—what has happened thus far, what you must do, and the fate that awaits if you do not.
She will also give you a Tall Tale quest book to assist you on your journey. You can find this book in your Quest Radial. The same way you might pull up your Voyage Quests.
Her spoken and written words are still less straightforward than poetic, but she shows you your next step in her mystical flames.
Step 2: Sail through the Mythical Portal
You must sail through the Mythical Portal.
After the Mysterious Stranger has finished speaking, you will see the portal appear near your Outpost.
Don’t worry, you’ll see it. It would be hard to miss this green, glowing light filling a colossal rock formation and beaming up toward the sky.
Pirates, Ye Be Warned:
You cannot bring treasure with you into the Sea of the Damned. Your worldly possessions must stay behind. So, if you’ve got something worth selling, do so before you sail through that portal!
Step 3: Sail through the Tunnel of the Damned
The mythical portal will take you into the Tunnel of the Damned.
In the Tunnel of the Damned, you are no longer in control. It will ferry you where it will.
Ah, but there’s still plenty to witness!
Gradually, you’ll see rowboats approaching, each seemingly ferrying a soul. But, tempted though you may be, you cannot jump off the side of your boat to get a closer look.
You’ll also see shadowy ships in the distance. Ah, but there’s no cause for alarm; they seem to keep that distance.
Finally, you’ll see your destination’s portal up ahead. There’s naught to do but take in an out-of-body experience in a cinematic view of your journey through to the other side.
Step 4: Dock your Ship
You emerge from that second portal in “Strange Shores.”
After not having control of your wheel, you might be tempted to allow your ship to continue its course. However, it is now time for you to take the wheel, lest you fancy wrecking your vessel at the beginning of your journey.
You’ll see your destination straight ahead: an island silhouette of jagged rocks and palm trees.
Sail on over, raise your sails, and disembark!
If you pull out your compass, you’ll notice that you are roughly on the East-by-Southeast side of the island.
Step 5: Find the Cliff's Entrance
Look along the coastline for a large, hollowed-out hull emerging from the waters and up the beach.
From there, head inland (in a Southwest-by-West direction).
Up ahead, you’ll see another such hollowed-out hull. Follow where it leads.
Soon you’ll see a ghostly statue in the Ferryman’s characteristic garb. It stands before a corridor carved into the cliffs.
Head down that corridor, me hearty!
This statue is called the Wraith Statue. It functions similarly to the mermaid statues in the Heart of Fire Tall Tale.
Essentially, if you have a Tall Tale Checkpoint saved, you still must sail through the Tunnel of the Damned to arrive in this other realm.
After doing so, this statue can transport you to where you last saved a Tall Tale checkpoint.
Step 6: How to Navigate "Dead Man's Grotto"
Along this next part of your journey, you will walk through corridors that each lead to a cavern. In these caverns, there will be a gate, door, or other barrier preventing you from continuing along the path.
There are no journals to find in Dead Man’s Grotto. So, there is no need to fret about missing one as you enjoy your journey.
How to Open the First Barrier
Taking in the scene of this first cavern, your eye will likely soon wander to a campfire.
Approach that campfire, and you will notice a prompt indicating that you must equip your lantern to take the flame.
Pull out and raise your lantern (Left Trigger). You should then receive the prompt to take the Flame of Souls.
If one member of your crew has taken the Flame of Souls, don’t worry if you cannot take the flame yourself. Once one crew member has collected that campfire’s green glow, everyone in the crew will have it flickering in their lantern.
You’ll then use the flame to light two lanterns.
Aye, there are two skeletons sprawled out on either side of the door. Each is holding a lantern. Light both lanterns and the door will open.
How to Open the Second Barrier
Follow the corridor into the next cavern. You’ll begin to hear more unmistakable sounds from the Pirates of the Caribbean ride—including a Seagull.
You’ll find this Seagull on the right-hand side of the room, sitting atop a skeleton’s hat. This skeleton also holds a lantern. Use your Flame of Souls to light this lantern.
Next, approach the skeletons to the left of the next door. You should stumble upon the remains of one pirate with the prompt “move arm.”
Once you move its arm, you’ll see yet another lantern. Light this lantern, too.
Ah, now you may notice an opening further off to the left of this cavern. It leads to a narrower tunnel, with a little rivulet slipping out to a cave opening.
Follow that trickling water until you come to a broken rowboat. In that rowboat, you’ll find the third and final lantern. Light the lantern and behold what happens next!
As you head back from the rowboat, you’ll see apparitions dragging chests up the rivulet and into the cavern. You’ll then see them circle the capstan, using it to lift the gate and clear your path.
The Stormy Locked Ship
From this path, you’ll emerge into the open air—and a strange scene.
You’ll see a ship with a captain at the wheel—perhaps the iconic storm-battered ship from the ride—and what appears to be his crew on the shore.
Meanwhile, an echoing voice issues warnings about the curse of “Dead Man’s Grotto.”
Continue to follow the path through the ship to the other side.
How to Open the Third Barrier: A Door that Needs a Handle
Waterfalls and grottos surround you along this following path—and a heartwarming tune fills the air: “Yo Ho! Yo Ho! A pirate’s life for me!”
Ah, but then the path grows darker.
You then come upon a scene of pirates drinking around a campfire—all except one. One pirate stands off to the side. Slowly, she reaches for her blade. We can only assume what befell the others.
On the West side of this cavern, you’ll see a waterfall. Jump through that waterfall, and you’ll find yourself in another cavern.
Propped against the North wall of this cavern is a shattered rowboat with a skeleton inside. You’ll also notice the glint of treasure!
Approach the skeleton, and you should see the prompt, “Pick Up Oar Handle.” Pick it up, and bring it with you to your next barrier.
This barrier looks like a proper door. Next to the door, you’ll see a lever. If you do not have the oar, the prompt will read, “Needs a Handle.”
If you approach while holding the oar, the prompt will read, “Repair.” So, repair the lever, use the lever, and continue on your way.
The Fourth Barrier: How to Lower the Double Drawbridges
In this next section, you’ll get a bit of platforming. Falling is not so bad, though.
If you fall, your walk slows to a saunter, requiring you to amble your way to a spot where you can climb back up (usually the beginning).
Next, you’ll see water cascading down to and over your pathway. Don’t worry; simply walk across the rushing water to where your path continues on the other side.
Pirates, Ye Be Warned:
If you decide to take a dive over the edge, you will find yourself several caverns back, and you’ll need to follow the path once more to rejoin your crew.
Continue along the path, and you will walk into a large room with a raised drawbridge. Before the drawbridge, you’ll find a small dock jutting out over the water with a few broken crates and a lantern.
Light that lantern.
A rowboat carrying a ghostly crew will appear and begin rowing along towards the raised drawbridge. Though, they will disappear as their path is currently blocked.
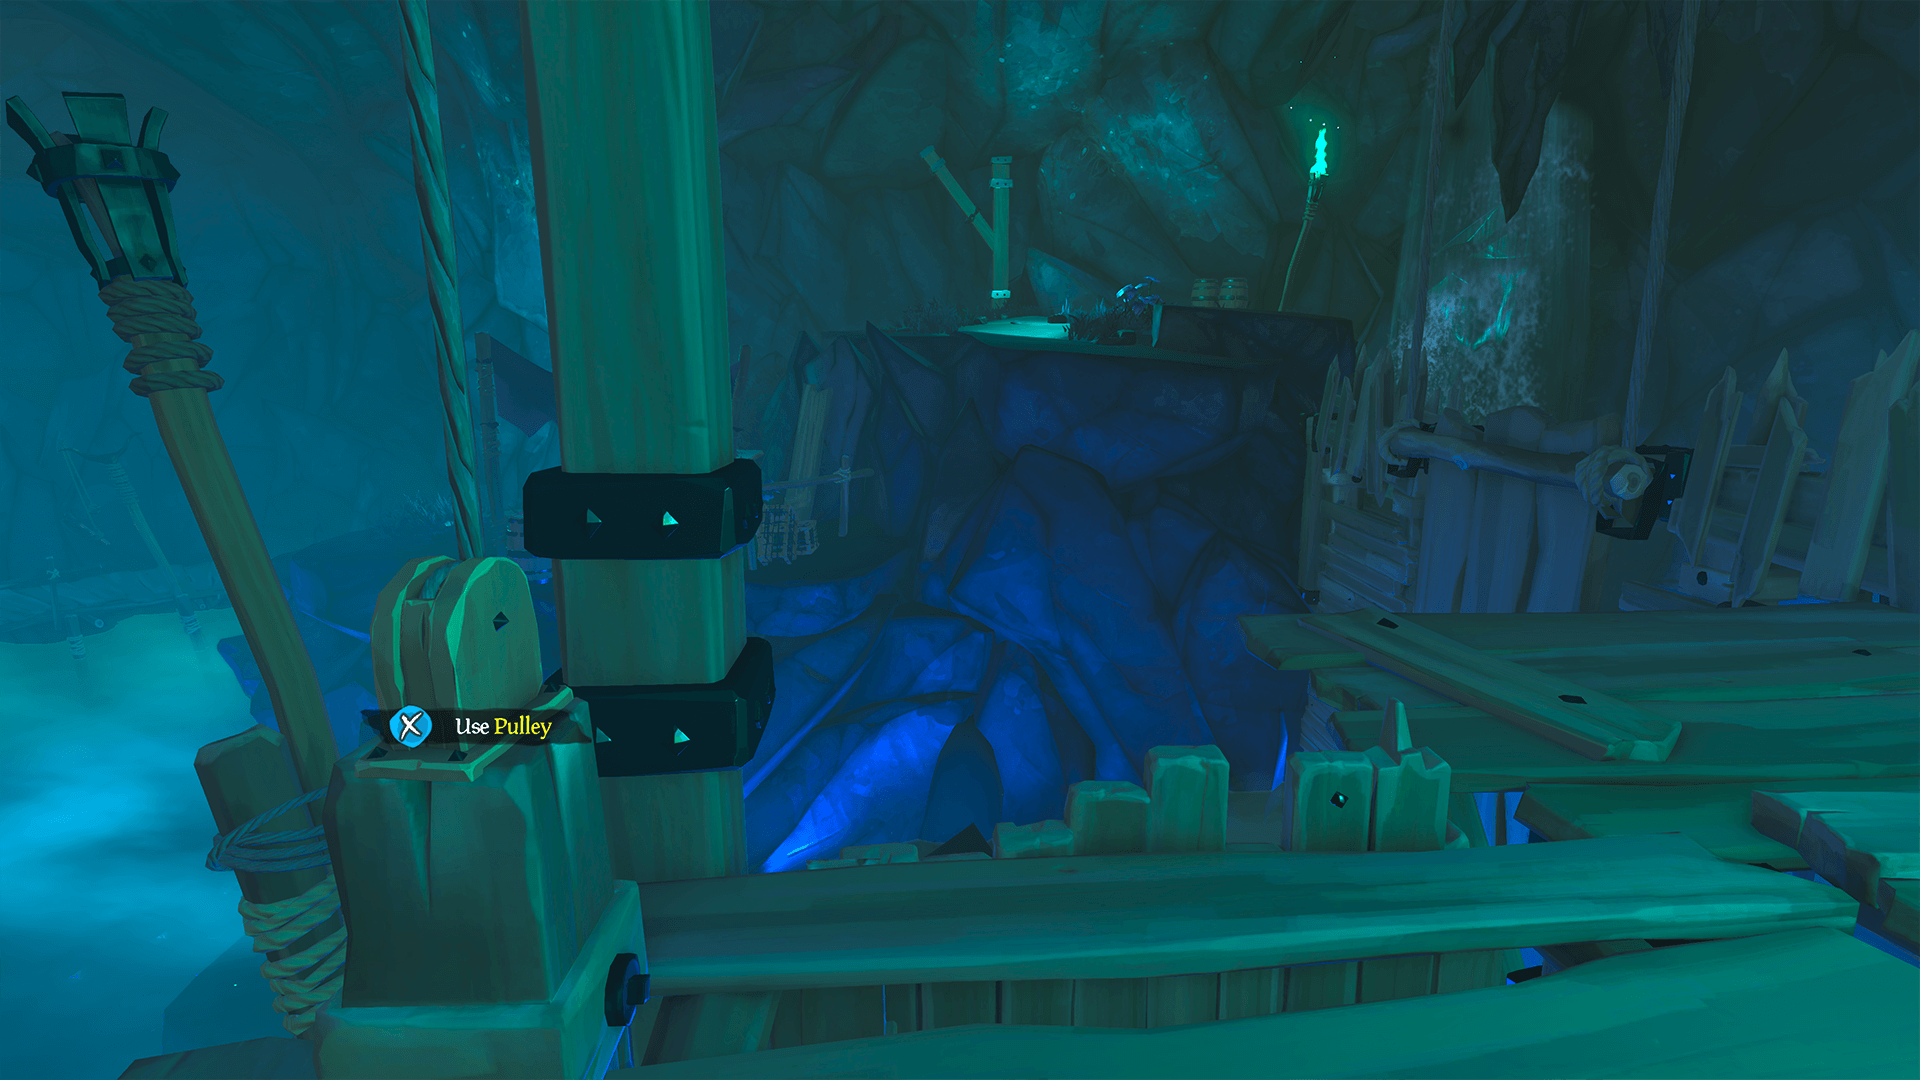
Follow the ghostly crew up the path to the drawbridge to find a capstan. Raise the anchor to lower the drawbridge. Cross the drawbridge to a platform. At the edge of that platform, you’ll see a pulley. Use the pulley to create another platform.
This platform will allow you to jump across to the other side.
Once again, if you fall, it’s only a minor setback. Underneath the platform connecting to that first drawbridge, there’s a ladder underneath the platform you were standing on. Clamber to shore, climb the ladder, and try your luck again.
Walk along the dock to the next drawbridge.
Below the drawbridge, off to the left, you’ll see an unlit hanging lantern. Light that lantern. This will, in turn, light the remaining torches around the room.
Once you have lit both lanterns, the rowboat carrying a ghostly crew will suddenly appear again and begin rowing along the path towards the second drawbridge.
When the rowboat reaches the second drawbridge, the scene will end, and the drawbridge will open—but not before you’ve witnessed yet another dastardly act of betrayal!
The Treasure Cavern!
Aye, follow these spectral sailors to the infamous treasure cavern! Hop over the giant treasure-laden rock as your path will continue on the other side.
This path will lead you up to a mildly perilous precipice. There, you’ll hop across what looks like fallen stalactites and into a tunnel, which leads to the final cavern.
The Final Cavern
You’ve come to your final cavern of platforms. Again, it’s not a far fall, but falling will mean you’ll need to go—slowly—back to the beginning of the section.
When you first enter, you’ll likely notice that the walkway marking your path forward has a significant gap in the middle. However, you’ll also likely spot a ladder to your right.
Climb that ladder up to the platform above. There you’ll see an armory chest.
If you don’t have a sword on hand, you’ll want to equip one now. Just ahead of the armory is a threadbare rope. Cut that rope to lower a platform. The walkway is now complete, and you can walk safely across.
Keep that sword equipped! You’ll need it again.
If you’re feeling a bit daring, you can also use your sword to lunge across the gap.
To the right of the next broken bridge, you’ll see a pulley. Use that pulley to bring the mast over.
Once you release the pulley, the mast will begin slowly falling back into place. So, you’ll want to board the mast quickly.
Next, you’ll come to another threadbare rope. Slice that rope and hop on over.
Finally, you’ll see a rushing river to your right. It looks a bit like a water slide, no?
This is a point of no return.
Aye, but there’s so much to explore ahead! Step on in. The water’s fine!
Soon, you’ll emerge with a beautifully eerie view of Sailor’s Grave!
Walk down the pathway to your right. Doing so will trigger two milestones in your Tall Tale journey!
First, you will unlock the Commendation for “Strange Shores”: “You successfully navigated Dead Man’s Grotto.”
Second, you will earn a checkpoint for the Tall Tale, allowing you to return to this spot in a later session.
Step 7: Enter Sailor's Grave
You’ll need to open the gates of Sailor’s Grave to proceed.
As you walk down toward the town, look for a brazier to your left. Light that brazier, and you’ll see beacons light up throughout Sailor’s Grave.
You’ll then see apparitions raising a capstan, opening the gates, allowing you to enter.
Upon further inspection, that capstan looks an awful lot like the “Silent Barnacle”?
Step 8: Do a Good Deed for a Cursed Captain
Find and Rescue the Cursed Captain
Slowly, as you descend further into Sailor’s Grave, you’ll hear the Cursed Captain begin to speak. Walk down to the shoreline, and pass the Sailor’s Grave sign on your right.
Continue following his voice until you see a glowing cage high overhead. He’ll beckon you up to where he dangles. If you look for a path up to the captain, you’ll soon notice stairs to your left.
As you climb those stairs, lanterns will guide your steps up to a ship.
The ship is quite close to the Cursed Captain but just out of reach. So, you’ll need to head the opposite way to reach him.
Walk across the fallen mast. Once you reach the other side, drop into a hole in the hull and into the waters below. Swim across.
You’ll emerge from the water to find a pulley. Use that pulley to hoist you and your crew to the next platform.
After letting go, the platform will lower back down. However, it will do so rather slowly. So, you might want to make sure your whole crew is aboard before you start to lift.
On this platform, you’ll see your next pulley ahead, a little to the left.
Ah, but to the right, you’ll see a captain’s quarters—with gold, too! Unfortunately, when you approach, you find the door reads, “Key needed to unlock.” Aye, best be saving that for after you’ve rescued the Cursed Captain.
Go back to that pulley. Use it to raise a platform of barrels and crates. Don’t worry; if you let go of this pulley, the platform stays.
Once you’ve made it across, you see a few stairs up to your right. There you’ll see the pulley you’ll need to make it to the shipwreck.
This pulley will move two platforms across the gap—one from your side and one from the other.
Pull the platforms just enough so that you can hop from one to the other without falling.
On the other side, you’ll see a brig with glinting treasure inside. However, again—since you do not yet have any further clues on how to enter this locked brig or what to do once you’ve entered—it would probably be best to continue to the Cursed Captain.
Climb the bowsprit over to the captain’s cage. Looking down at the cage, you’ll see another threadbare rope and a prompt that reads, “Requires lantern to Ignite.”
Despite the Captain’s plea for a gentle descent, it seems this is the proper way to get him loose.
(Alternatively, you can cut the rope with your sword if you prefer.)
Find and Retrieve the Cage Key
Ah, despite the fall, the cage remains intact. You could leave the Captain to his fate. However, seeing as we know so little of this new world, and he’s offering words of wisdom, perhaps we’d better find the key.
From the fallen cage, head South toward a wrecked galleon. You’ll see a sign swinging from its bowsprit reading, “The Last Stand.”
You’ll see the key glinting atop the chandelier.
On the south side of the tavern—on the middle deck—you’ll see a pulley. That pulley is connected to the chandelier. Use that pulley to lower the chandelier and retrieve the key.
Be sure to read the journal on the top deck of the tavern before returning to the Cursed Captain with the key.
Click images to Enlarge
After you have read the journal, bring the key back to the Cursed Captain, and set him free.
By doing so, you will unlock the commendation, “Tales of the Dead: Do a good deed for a Cursed Captain.”
Before continuing through the Tall Tale, two nearby journals are off the beaten path you’ll want to ensure you read.
From the Cursed Captain’s cage, walk North to find a wooden path that leads North East to a shipwreck.
Following the wooden path will lead you to a door you can open to access the shipwreck’s hull. Open the door and step inside. You’ll find the journal on a table to the right of the bed.
Click images to Enlarge
After reading the journal by the bed, head back out and make your way back to The Last Stand tavern. Instead of walking inside, turn left and enter the rear of the nearby shipwreck. You will walk to a gambling den and find the journal on a table to the left of the chess game.
Click images to Enlarge
Step 9: Restore lost light and summon a rescue.
Back to the Tall Tale! Go back to the Cursed Captain and pick him up. Then, walk toward the lighthouse with the Cursed Captain in hand. You’ll soon come to a large gap, where it seems a bridge should be.
Luckily, it seems that the Cursed Captain has a way to bring back that bridge.
Simply wait at the bridge’s entrance; soon enough, the ground will rumble, and the bridge will rise up, allowing you to cross.
Cross the bridge and continue up the lighthouse. You’ll know you’ve almost reached the top when the steps turn to stone.
Once you reach the top, the Cursed Captain requests that you place his skull upon a suitable body of bones. You’ll find such a headless skeleton seated with a spyglass in his grasp.
Be sure to read the journal nearby in the bookshelf before climbing up the ladder to the top of the lighthouse
Click images to Enlarge
After you’ve read the journal, climb the ladder up to the very top of the lighthouse. There you’ll find the lighthouse brazier. Approach it, and you will see the prompt “Raise Lantern to ignite Lighthouse.”
Once you’ve revived the flame, you’ll see a beam of light emanating from the lighthouse. If you want to summon the Ferryman, you’ll need to aim this beam.
On either side of the flames, you’ll see two wheels. One wheel allows you to pitch the lighthouse lens. The other allows you to rotate it.
So, where are we aiming this beam? You are looking for three nearby beacons.
You’ll find one to the Southwest. From there, turn left, and you’ll soon see two more.
Light all three, and you’ll unlock the commendation, “Waiting for Eternity: Restore lost light and summon a rescue.”
You’ll also see the Ferry of the Damned sail into view.
Step 10: Find the Cabin Key
Next, the Cursed Captain will request that you take him to his old ship: The Golden Hare. The Captain will direct you from there. Soon, the Cursed captain will ask you to reunite him with his body.
You might not wish to oblige him just yet.
Pirates, Ye Be Warned:
Once you place the Cursed Captain’s head on his original body in the Captain’s Cabin of his ship, you will no longer be able to complete several commendations and find the rest of the journals.
We’ll discuss those commendations in the section below.
So, if you’d like to earn those commendations, do not honor the Cursed Captain’s wishes just yet.
If and when you are ready to continue progressing through the Tall Tale, you may grant the Cursed Captain’s wish.
In exchange for your services, the Cursed Captain gives you his Cabin Key.
Before leaving the Captain’s Cabin, be sure to read the journal on the nearby bookshelf.
Click images to Enlarge
After you’ve read the journal, use the Cabin Key on the back door. Walk through the door and head to a rowboat which will allow you to row out to the Ferry of the Damned.
The Sailor's Grave Commendation Adventure!
There are six commendations to be found in Sailor’s Grave, and they are unlike any Tall Tale commendations we have ever encountered!
A Powerful Thirst
Raising the Dead
Treasure for the Dead
Ship of Thieves
Secret of the Grave
The Crew of the Headless Monkey
Most Tall Tale commendations occur naturally in the course of completing a tale. A few require little detours, but they generally don’t require pirates to stray too far from their main Tall Tale objectives.
By contrast, this series of commendations is a complete departure from the Tall Tale path, and—to complete all six—you must do them in sequence and in one session.
Aye, completing these six commendations is its own grand adventure—and we love it!
Below you’ll find miniature guides for each commendation where we’ll walk alongside you every step of the way. Between the Cursed Captain and Rare Thief, we like to think Sailor’s Grave offers mighty fine company.
Begin by rowing your boat South. You won’t be able to see the Ferry at first, but it should come into view as you pass the lighthouse.
Ah, and what a sight it is! Keep a weather eye. As you hear a bell toll, you’ll see a darkly cloaked figure bringing souls from Sailor’s Grave to the Ferry of the Damned!
Upon beholding this sight, you will unlock your next Checkpoint!
Sail up to the back of the ship, until you see the prompt to dock the rowboat. Disembark from your little vessel and climb aboard the Ferry!
Rather than heading left to the captain’s door (which is locked), head around to the right. There you’ll find a ladder.
Upon reaching the top of the ladder you’ll hear the Ferryman giving a speech to the souls he brought aboard. Aye, and you’ll gain a bit more insight into the lore of Sailor’s Grave—and, indeed, of the Ferry of the Damned even as we know it in the Sea of Thieves.
Once the Ferryman has finished his remarks, the ship sets sail on what the Ferryman promises will be a long journey. Now is your chance!
Step 12: Get Below Deck
To reach the prisoner you seek, you’ll need to get below that top deck.
Approach the Well of Fates, raise your lantern, and light the well with your Flame of Souls! Lighting the Well of Fates with the Flame of Souls will destroy the well and leave a hole where you can enter the lower deck.
Once below you’ll see a few resource crates. Stock up if you need.
More interestingly, you’ll an unlit lantern mounted beside a closed door. Light that lantern to open the door.
Approach the sarcophagus on the right side of the room. Move the lid, and you will reveal a lantern. Light that lantern.
You’ll also need to light the lantern across from it on the left side of the room. Illuminating both lanterns will open the caged door.
Now, you must simply walk down the now-infamous stairs to the brig and its prisoner.
Step 13: Release a prisoner from their captivity.
There you’ll find the famous Captain Jack Sparrow attempting to cajole man’s best friend into handing over the Brig Key. Unsuccessful as ever, he baits you into doing it for him.
Beware: the pirate that gets the keys, gets to pet the dog. We’re just saying.
Put the key into the lock and free Captain Jack!
By doing so, you’ll unlock your next commendation: The Prisoner: Release a prisoner from their captivity.
Step 14: Fight for the Ferry of the Damned!
After you’ve released Captain Jack Sparrow, follow him as he ascends to the top deck of the Ferry. As he meanders, he let you in on a bit more lore.
Upon reaching the top deck, the Ferryman spots and chastises you all. Ah, but someone else has come to join the fray: Davy Jones!
Thank goodness for those resources barrels, eh? Oh, and there’s an ammo crate by the main mast on the top deck.
The Ferryman calls you to arms. All that’s left to do is answer that call, and watch the story play out.
When the Tale has ended, the Ferryman returns you to the Tunnel of the Damned, which then soon delivers you back into the Sea of Thieves.
Aye, but we can’t wait to go right back in…
All Commendations
Strange Shores: Make your way through a lair of treasure and treachery.
Tales of the Dead: Do a good deed for a Cursed Captain.
Waiting for Eternity: Restore lost light and summon a rescue.
Raising the Dead: Learn what happens to pirates who betray other pirates.
Treasure for the Dead: Return a treasure to its ‘rightful’ owner.
A Powerful Thirst: Help quench the thirst of one who cannot help themselves.
Ship of Thieves: Find a way to open the door of a locked ship.
Secret of the Grave: Discover the secret of Sailor’s Grave.
The Prisoner: Release a prisoner from their captivity.
A Pirate’s Life: Complete ‘A Pirate’s Life’.
Tales of the Damned: Discover the Cursed Captain’s Journals in Sailor’s Grave.
The Crew of the Headless Monkey: Discover the Journals of the Headless Monkey’s Captain.
Mist and Memory: Legendary Commendation: Complete all Commendations for ‘A Pirate’s Life’.
Rewards
Cursed Captain’s Hat: Earn the ‘A Pirate’s Life’ Commendation.
Cursed Captain’s Sails: Earn the ‘Mist and Memory’ Commendation.
Ready for your next adventure in A Pirate’s Life? Head on over to our The Sunken Pearl guide to continue the story of Captain Jack Sparrow and his Treasure!
To the Tavern!
Aye, we pirates do love a good tavern. ‘Tis a place to share our findings and adventures. ‘Tis a place to clap each other on the back. ‘Tis a place to glean further insight.
Happily, we’ve found proverbial taverns on several social outposts—each bustling with a vibrant pirate community! Want to join in the merriment? Ye will always find a hearty welcome at our table!
If you look to the right of the cage with all the rum bottles, there’s a hole in the wall you can jump into from the platform to grab the rum for the skeleton.
How do you buy-in to the game once the skeleton’s head explodes once you give him the special drink? Also, what do you do with the Headless Monkey Key? Also, where is Poor Dougie’s Key?
Follow the gold under the dock and dig in hole for Old Doug’s body. Once you find his chest, in it is a coin you use to buy in. But you need cursed captain head. So do this first before you take him to his ship.
Just ran this, Raising the dead, Treasure for the dead, Secrets of the grave, and crew of the headless monkey are giving me some trouble. I’m assuming they are all connected to the graveyard area.
That in turn allows access to the sails, which need to be adjusted so you can use the lighthouse to light the brazier behind the treasure ship…. possibly opening the secrets of the grave area. (untested at this time.)
Ogre Steinbjorn
Theory confirmed. By turning the sails aside you can light a hidden brazier behind the treasure ship that opens the Secrets of the grave area via the lighthouse
Ogre Steinbjorn
Full Commendation. Two Books in cabin, One near forward mast, One near rear mast, One near wheel with key.
Jacob branch
were are all of the headless monkey crew journals can’t find any of them
We have a guide over here talking about how to get to them. You have to complete several commendations and side-quests before you can get to the area where they are.
Yep! We go over it here in this guide. If you go to that location you will find piles of gold. You will also see a trail of gold that leads back to the docks where is actually where you want to dig 🙂
If you were able to put the head on the skeleton playing chess you should be good. Did the Cursed Captain kill the other player and did you get the key?
Ahoy there! So you can use your Checkpoint by going to your voyage table on your ship and proposing a Tall Tale Checkpoint. More on that here. You will still need to sail through the Tunnel of the Damned though. Once in the Sea of the Damned, use one of the grim reaper looking statues near the entrance of Dead Man’s Grotto. It will take you to where you last left off in Sailor’s Grave.
Game is not instanced, been trying to pass the second chapter for the past 3 days… It’s buggy as hell and you run into other players that just constantly kill you…
The only instanced part of the first Tall Tale is while you are in the Sea of the Damned, after you go through the portal. As for other pirates before that, have you tried throwing up an Alliance Flag to show your intentions? That could help 🙂
Yep! Once a commendation is unlocked, it stays unlocked. Regardless if you complete the Tall Tale or not 🙂 So if you come back to get some commendations you missed the first time, you don’t need to complete it again.
Hmm, that part can take some time. Just make sure you keep shooting the Flying Dutchman as it passes by and get rid of any boarders. Be sure to check below deck. Sometimes a boarder can get stuck down by the Cannonball Barrels.
Can you please note in capital that putting the head on his own body makes you do the whole tall tale all over again.. This should have been changed in the guide 3 years ago..
Ahoy there! Sorry that you need to do redo some of the Tall Tale again. Hopefully you can use a Checkpoint! Can you specify which part exactly threw you off? We have large text in a different color than the rest of the guide that starts with, “Pirates, Ye Be Warned” to warn people.


45 thoughts on “Sea of Thieves: A Pirate’s Life Tall Tale Guide”
No Idea how to get the drink for the Skeletons? Door needs no key etc. We wanna have all commendations.
We are also stumped on that one at the moment…we will let you know when we figure it out!
There is a small opening on the side
If you look to the right of the cage with all the rum bottles, there’s a hole in the wall you can jump into from the platform to grab the rum for the skeleton.
Yes you find it when you are doing the pulley system when the two pieces pass each other there will be a little cave you can jump in
On the part with the two trollies you can move near that cage there is an opening on the side of it you can access for recipe
Does any on know how to do the secret of the grave commendation
nNed help, cant find the journals of the headless monkey crew got 4/5.
its on the mast bro, walk around it, right next to the wheel, we just spent 20 minutes searching for it
Where do you do all of the commendations?
I DID IT
THE KEY INTO THE SHIP
YOU FOLLOW THE TRAIL OF GOLD COINS AND THEN DIG IN THE MASSIVE HOLE
I can’t find how to open the locked ship door. I got all the gold, but it’s a commendation. Arhggg.
How do you buy-in to the game once the skeleton’s head explodes once you give him the special drink? Also, what do you do with the Headless Monkey Key? Also, where is Poor Dougie’s Key?
The Headless Monkey Key is used on the shipwreck you found it on. It will open the Captain’s Cabin where two journals are located.
Follow the gold under the dock and dig in hole for Old Doug’s body. Once you find his chest, in it is a coin you use to buy in. But you need cursed captain head. So do this first before you take him to his ship.
buy in?
Just ran this, Raising the dead, Treasure for the dead, Secrets of the grave, and crew of the headless monkey are giving me some trouble. I’m assuming they are all connected to the graveyard area.
Just found Poor Dougie buried beneath the Dock for raising the dead and treasure for the dead
Dougie’s treasure is the item used for the buy in
Which wins you the key for the treasure ship
That in turn allows access to the sails, which need to be adjusted so you can use the lighthouse to light the brazier behind the treasure ship…. possibly opening the secrets of the grave area. (untested at this time.)
Theory confirmed. By turning the sails aside you can light a hidden brazier behind the treasure ship that opens the Secrets of the grave area via the lighthouse
Full Commendation. Two Books in cabin, One near forward mast, One near rear mast, One near wheel with key.
were are all of the headless monkey crew journals can’t find any of them
We have a guide over here talking about how to get to them. You have to complete several commendations and side-quests before you can get to the area where they are.
I have done every commendation besides this one
Check my post
At the top of the tavern there are some pirates looking at a map, which marks a cross on it, I went digging there and I can’t find anything, any help?
Yep! We go over it here in this guide. If you go to that location you will find piles of gold. You will also see a trail of gold that leads back to the docks where is actually where you want to dig 🙂
Put the head on his old body before he beat the guy in chess what do I do?
If you were able to put the head on the skeleton playing chess you should be good. Did the Cursed Captain kill the other player and did you get the key?
I did all the Commendations but the hat and sail are still locked, Help!
guide was perfectly put together without letting in too much info on how to progress.
Hey ! How do I easily load a save ? I’ve just finished Sailor’s Grave but I can’t find a way to go back at my save without starting all over again…
Ahoy there! So you can use your Checkpoint by going to your voyage table on your ship and proposing a Tall Tale Checkpoint. More on that here. You will still need to sail through the Tunnel of the Damned though. Once in the Sea of the Damned, use one of the grim reaper looking statues near the entrance of Dead Man’s Grotto. It will take you to where you last left off in Sailor’s Grave.
Game is not instanced, been trying to pass the second chapter for the past 3 days… It’s buggy as hell and you run into other players that just constantly kill you…
The only instanced part of the first Tall Tale is while you are in the Sea of the Damned, after you go through the portal. As for other pirates before that, have you tried throwing up an Alliance Flag to show your intentions? That could help 🙂
once you complete the commendations and have done the tell tale before can you leave and keep the commendations?
Yep! Once a commendation is unlocked, it stays unlocked. Regardless if you complete the Tall Tale or not 🙂 So if you come back to get some commendations you missed the first time, you don’t need to complete it again.
Can’t get passed the part were Jack Sparrow is fighting the monster while Davy Jones attacks the ship.
Hmm, that part can take some time. Just make sure you keep shooting the Flying Dutchman as it passes by and get rid of any boarders. Be sure to check below deck. Sometimes a boarder can get stuck down by the Cannonball Barrels.
Can you please note in capital that putting the head on his own body makes you do the whole tall tale all over again.. This should have been changed in the guide 3 years ago..
Ahoy there! Sorry that you need to do redo some of the Tall Tale again. Hopefully you can use a Checkpoint! Can you specify which part exactly threw you off? We have large text in a different color than the rest of the guide that starts with, “Pirates, Ye Be Warned” to warn people.
I spent 10 mins trying to get the ship threw the small portal on the beach and it wasn’t working.
What do you mean? At the very beginning? Did you start the Tall Tale by voting on the book by the Castaway?